

For a blind person, an ordinary pavement says nothing about what comes next: where the pedestrian crossing is, where the stairs begin, where the platform ends. Tactile surfaces give this information underfoot and at the tip of the white cane: one relief that shows where to walk and another that says stop. This guide explains the two types of tiles, where each one goes, how to choose the size and the colour, how many tiles you need for a route, a stair or a crossing, and how they are glued down.
What tactile surfaces are
Tactile means something you sense by touch. Tactile surfaces are tiles with a raised pattern that are glued onto pavements, platforms and floors, and their relief gives blind people information they feel with their feet or with the white cane. You will find them under several names: tactile paving, tactile markings, tactile tiles, tactile mats for the blind. They all mean the same thing: tiles laid next to each other to form a route or an area.
When people speak of a tactile-visual surface, they add the second half of the story: colour. For people with low vision, the tile has to contrast with the floor around it, so a well-chosen surface can be felt underfoot and seen with the eyes.
Guidance and warning: two types, two messages
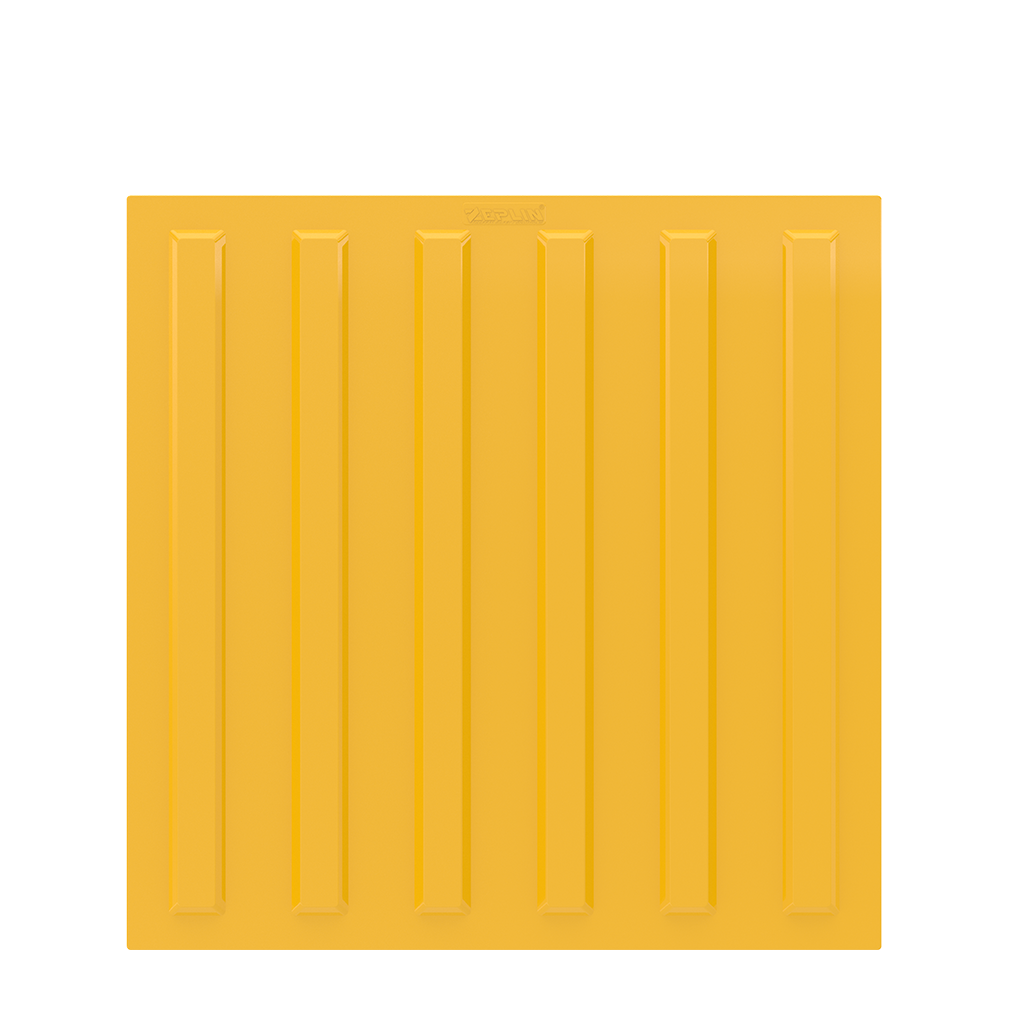
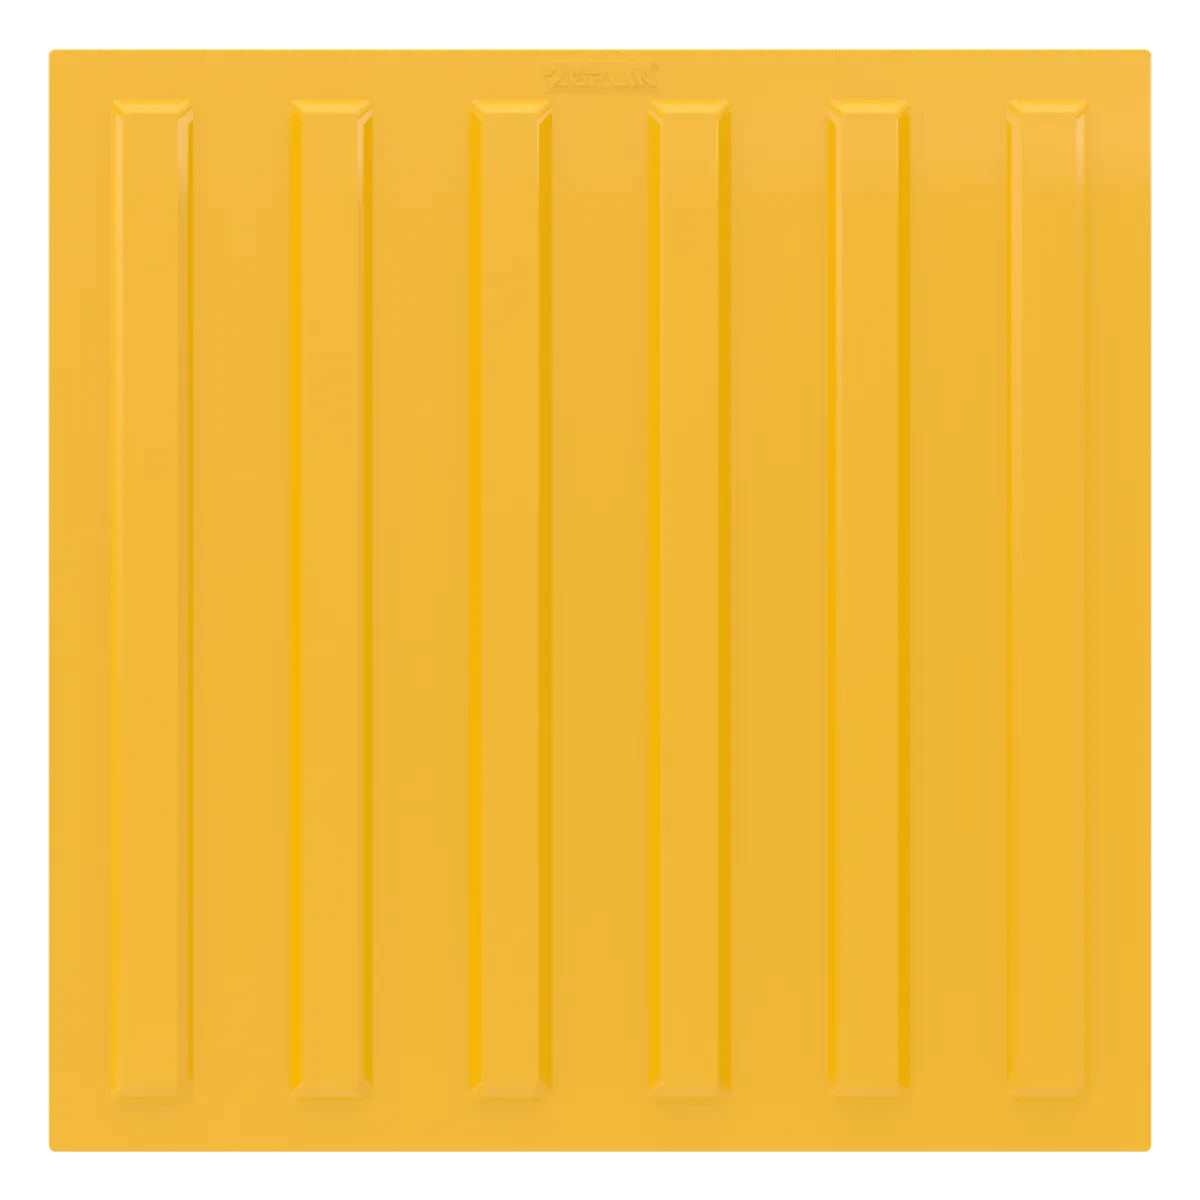
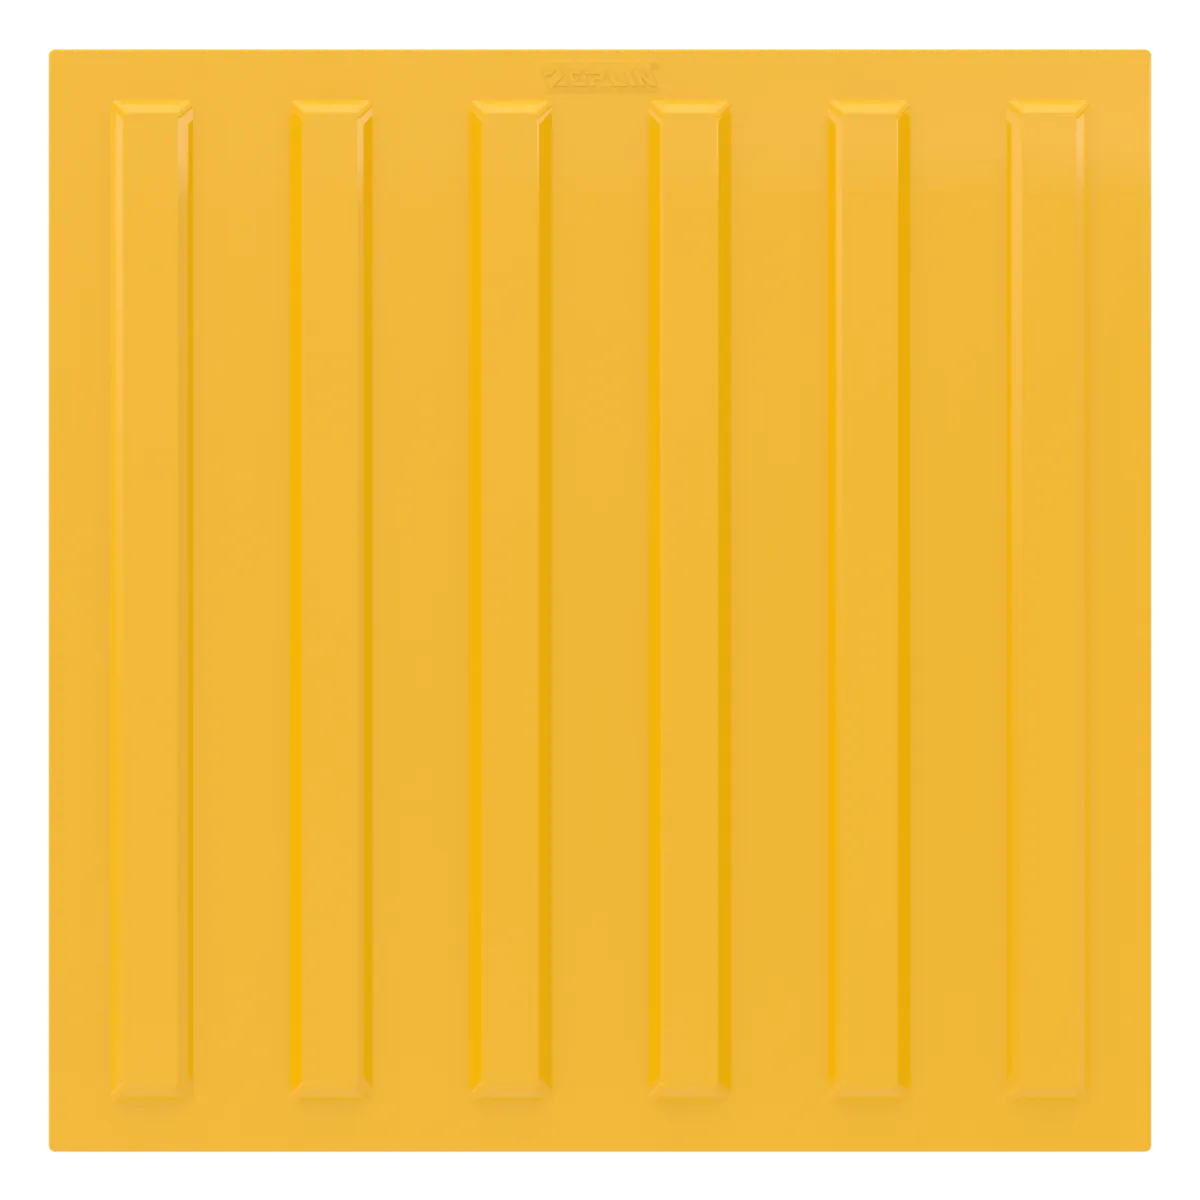
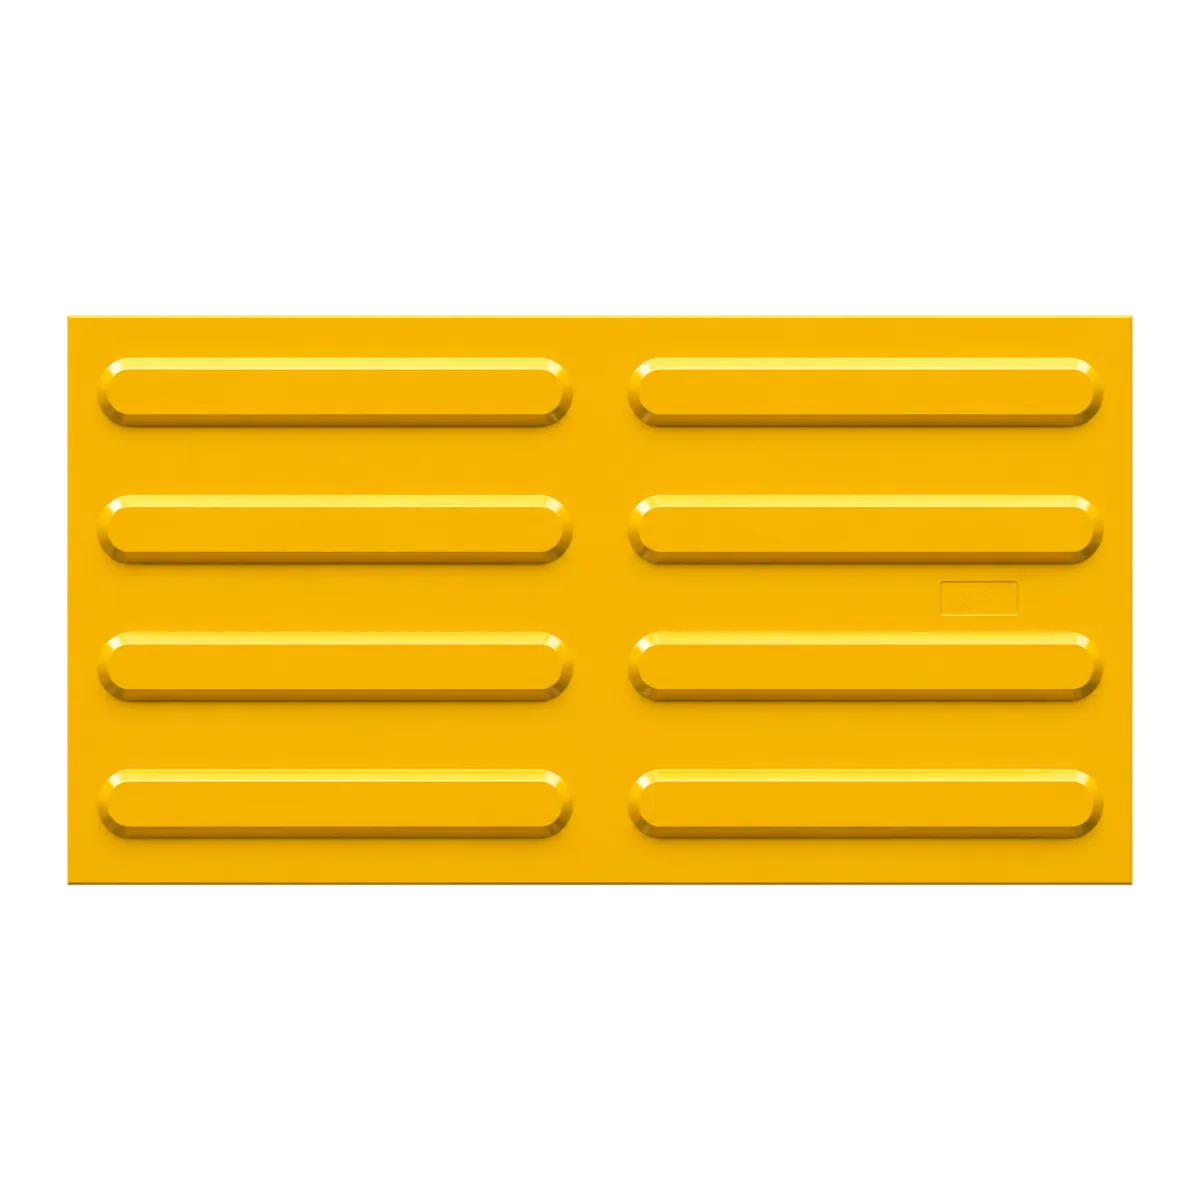
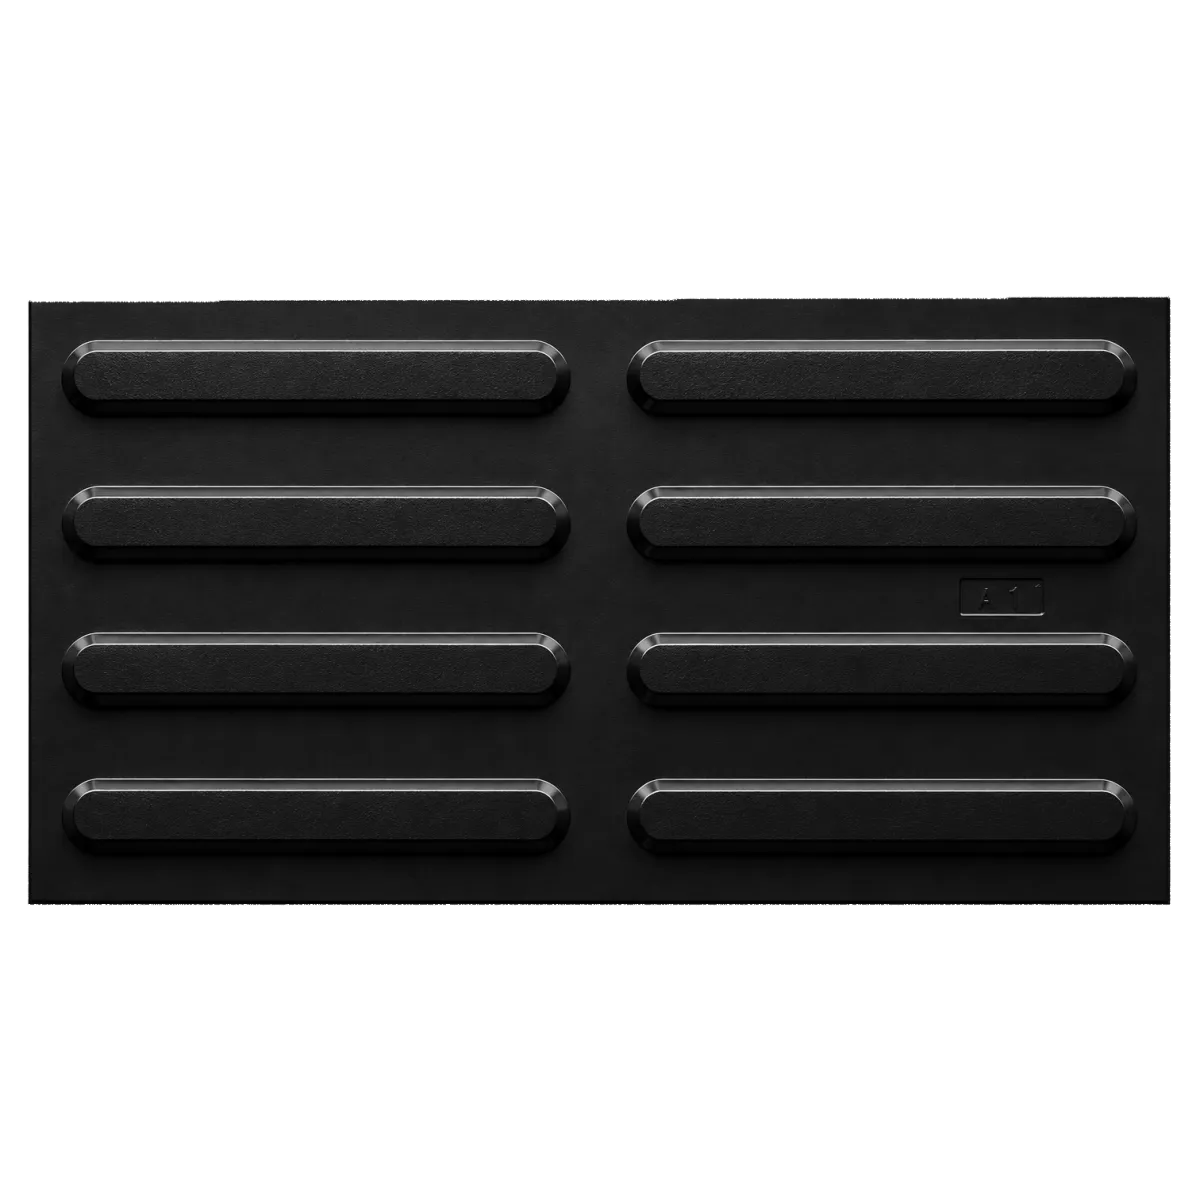
Guidance tiles, with ribs
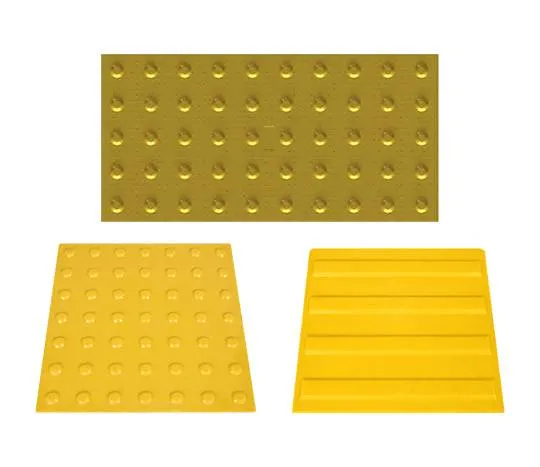
Guidance tiles have parallel raised ribs that show the walking direction. A blind person follows them with the feet or the cane and walks along them on a route free of obstacles: from the gate of a building to its entrance, along a platform, through the hall of a station. Because their message is direction, the ribs always run in the walking direction and line up from one tile to the next, so the line does not break.
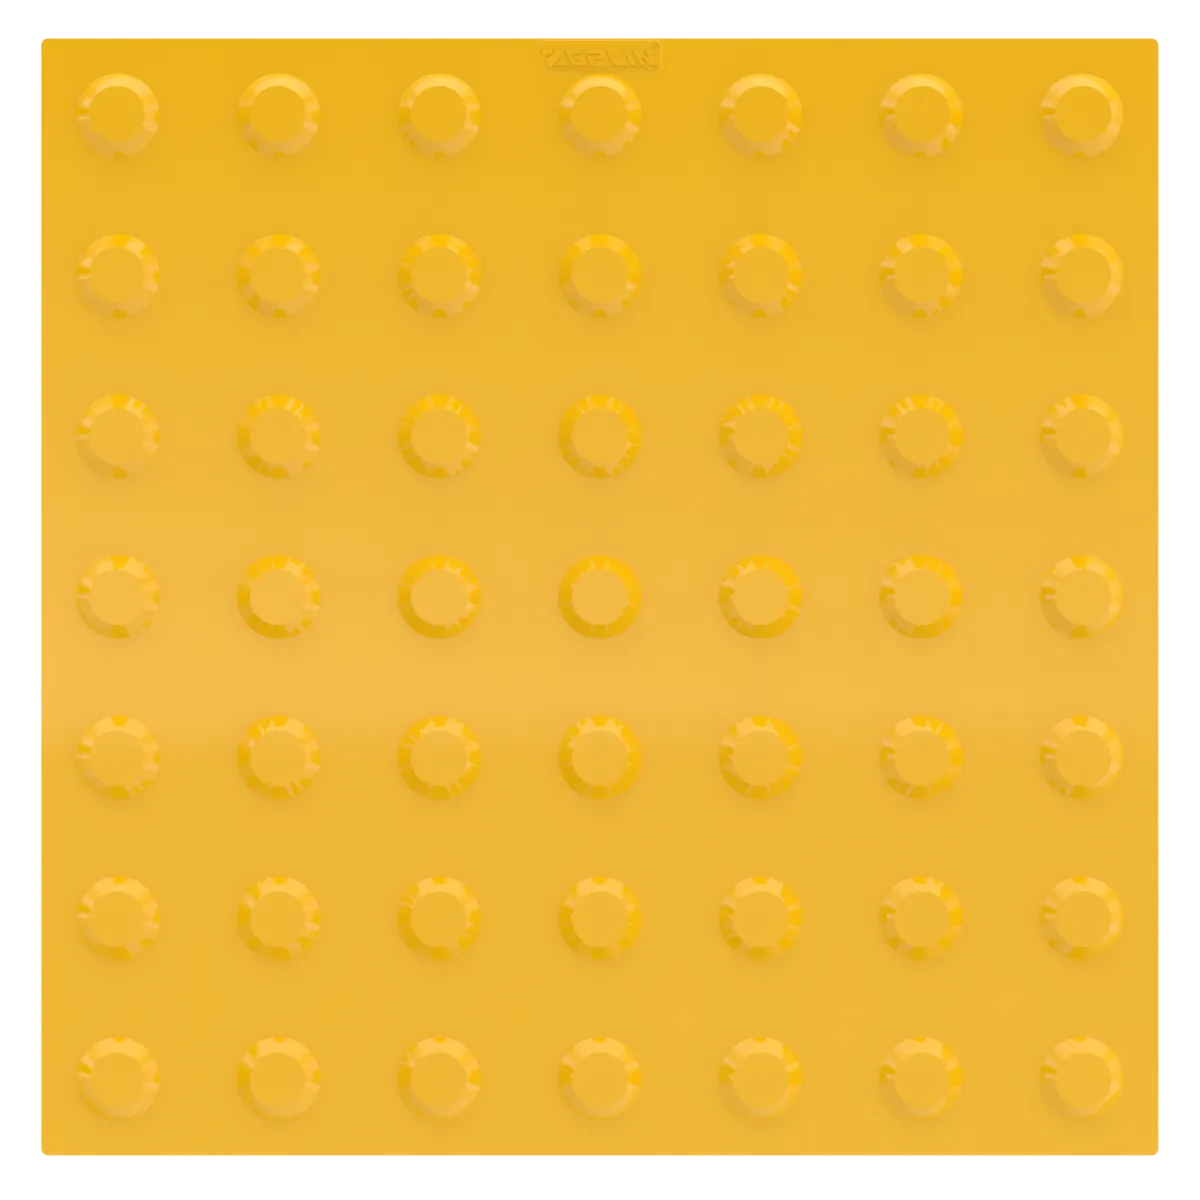
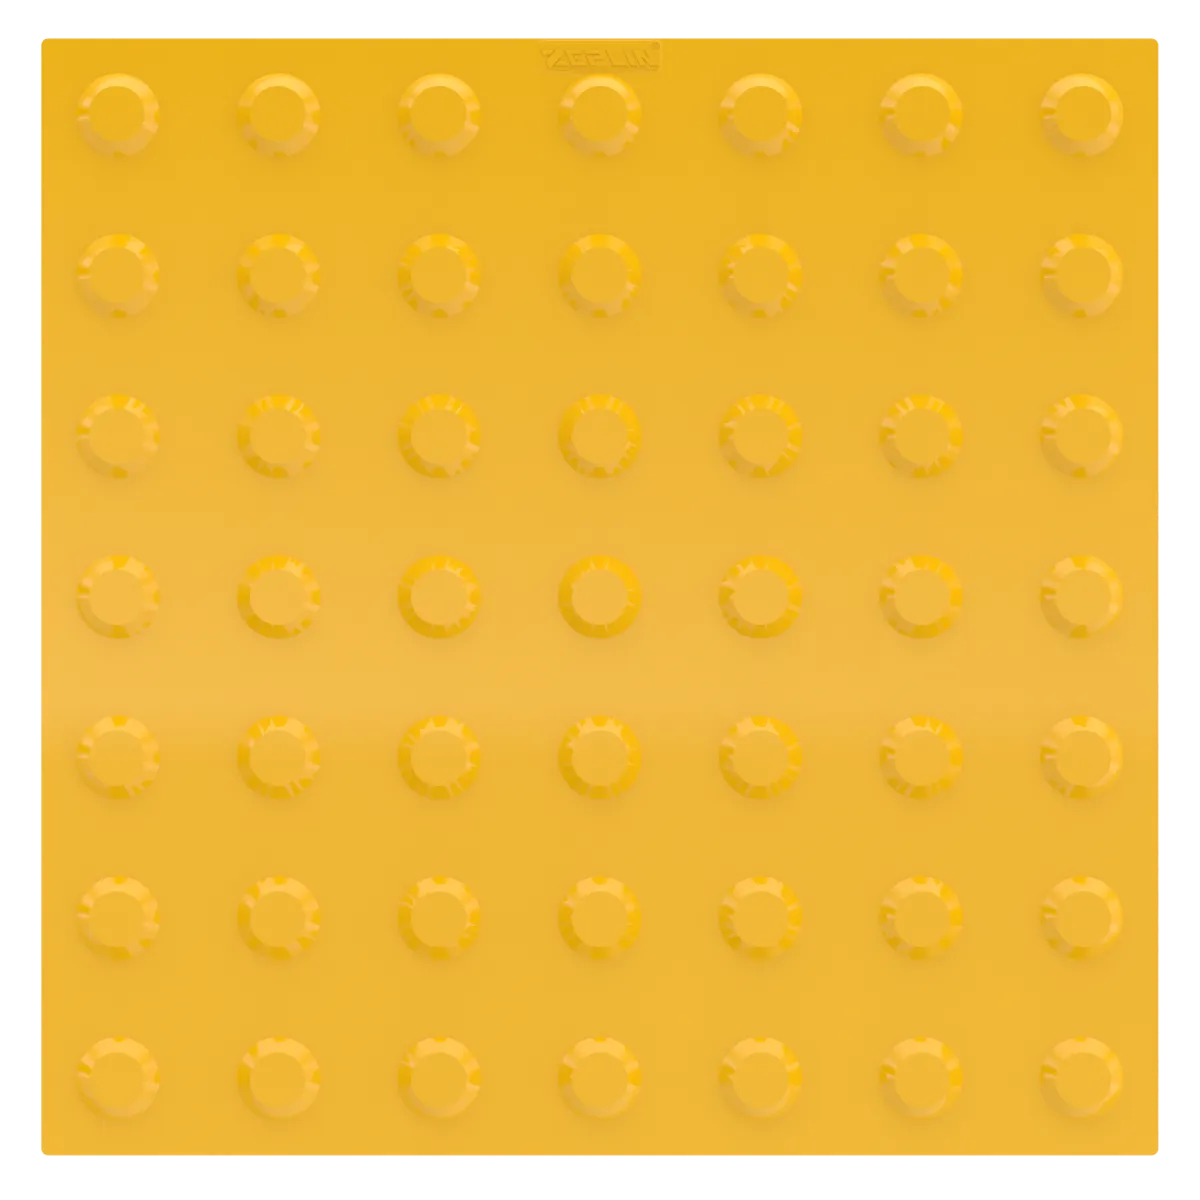
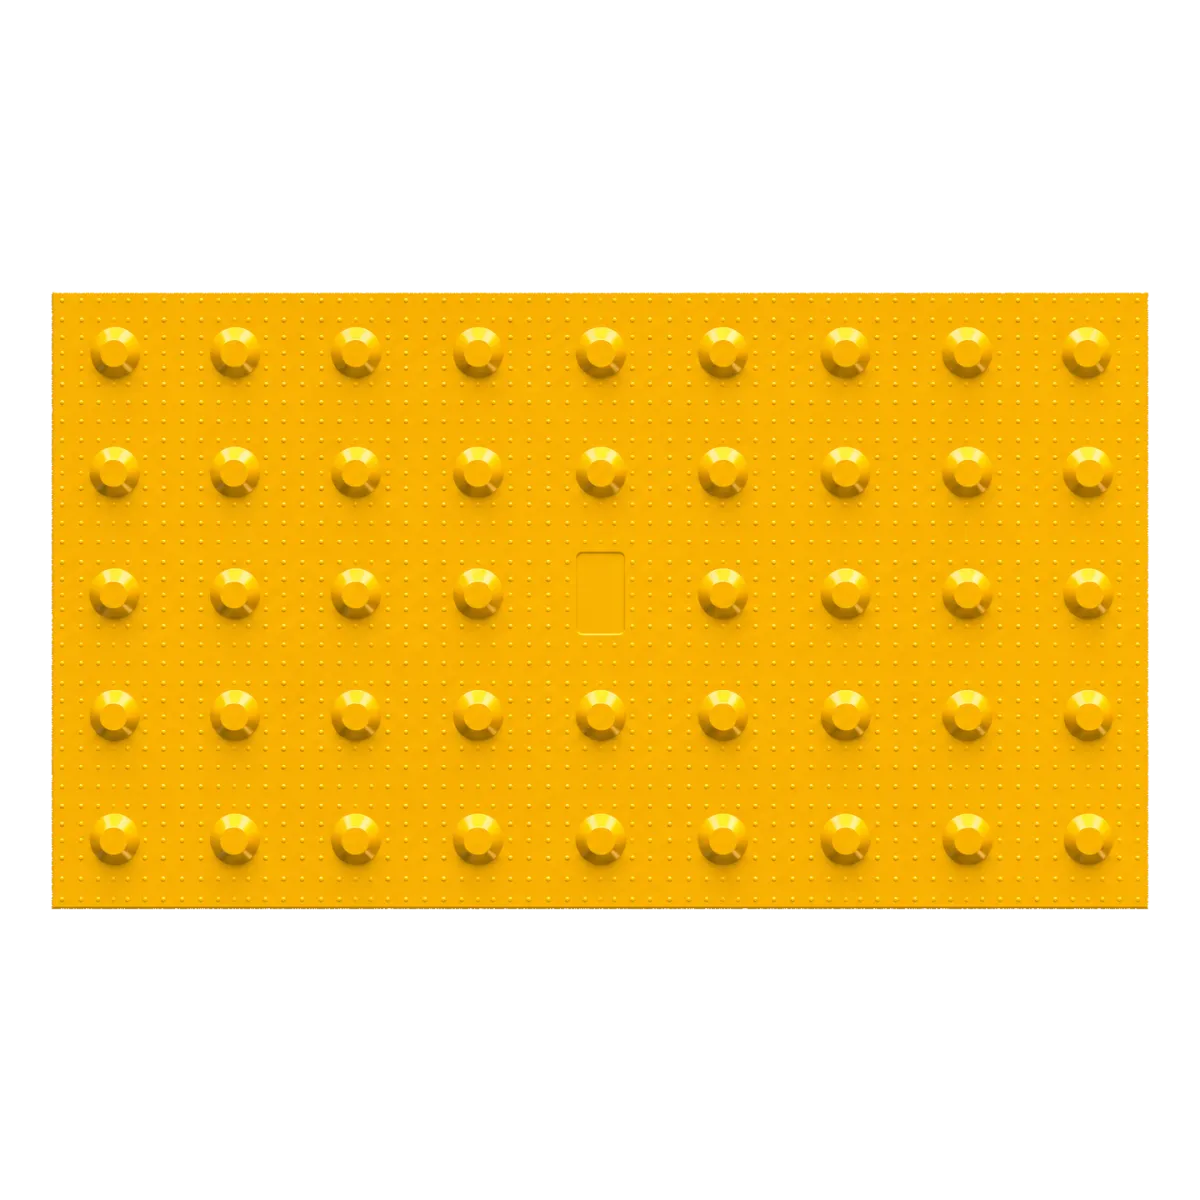
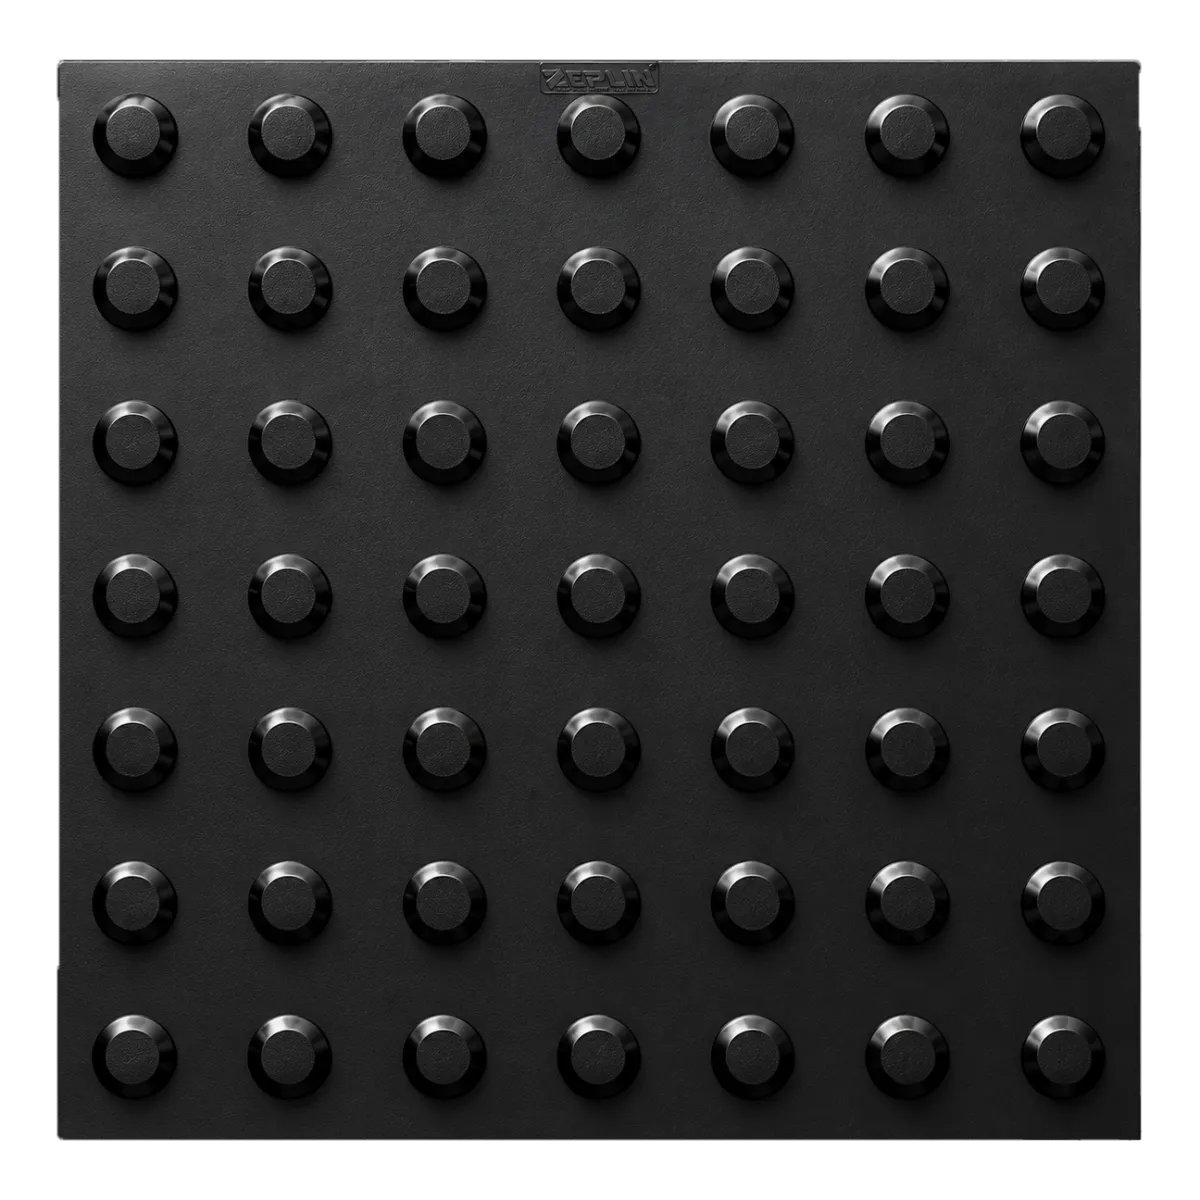
Warning tiles, with domes
Warning tiles, also called STOP tiles, have raised domes set in regular rows. They say “stop”: ahead there is a pedestrian crossing, a tram line, the top of a stair or the edge of a platform. Someone walking with a white cane feels the difference from the ribs of the guidance tiles straight away.
How they work together
A typical route combines both: guidance tiles lead the person along the pavement or the hall, and warning tiles stop them before the crossing, the stairs or the platform edge. Where the route changes direction, the spot is usually marked with warning tiles too, so the person knows to stop and get their bearings. All the tiles in the range have the same thickness, 0.8 cm, so guidance and warning tiles are glued side by side, at the same level, with no step between them.
Where each type goes
- on pavements: guidance along the route, warning before the pedestrian crossing and the tram line;
- on platforms and at public transport stops: guidance along the platform, warning at the edge;
- at the entrances of public buildings: guidance from the gate to the door;
- in halls and corridors of stations, airports and public buildings: guidance down the middle of the corridor, warning before stairs and steps;
- at the end of every guidance route and where the route turns: warning.
The sizes: 30 x 30, 40 x 40 and 30 x 60 cm
All the tiles are made of TPU (thermoplastic polyurethane), are 0.8 cm thick and have an anti-slip surface. Each size has a guidance tile and a warning tile, and each of them comes in yellow RAL 1003 and in black RAL 9017. Because they are glued, you do not have to lift the paving or the floor tiles: the tile goes on top of the existing floor.
30 x 30 cm, for narrow routes and corners
This is the smallest size in the range. It suits paving made of slabs of the same size and narrow routes, and small tiles are easier to work with at corners and changes of direction.
- guidance: ATZ 9003 (yellow) and ATZ 9003-BK (black);
- warning: ATZ 9004 (yellow) and ATZ 9004-BK (black), 0.35 kg each.
11.1 tiles fit in one square metre. You will find them under 30x30 cm tactile tiles.
40 x 40 cm, for wide routes and large areas
One tile covers 0.16 m², almost twice as much as a 30 x 30 cm one, so a large area means fewer tiles to glue. This size suits wide routes and large warning areas in stations, airports, public transport stops or in front of public buildings.
- guidance: ATZ 9005 (yellow) and ATZ 9005-BK (black), 0.65 kg;
- warning: ATZ 9006 (yellow) and ATZ 9006-BK (black), 0.55 kg.
6.25 tiles fit in one square metre. All are under 40x40 cm tactile tiles.
30 x 60 cm, for long routes
A 30 x 60 cm tile covers 0.18 m², as much as two 30 x 30 cm tiles, so on a long route you lay half the pieces and, with them, half the joints. This size is used on platforms, long pavements and the corridors of stations, airports and public buildings. On the guidance tiles the ribs run parallel to the long side, so the tile is laid with its 60 cm side in the walking direction.
- guidance: ATE 8016 (yellow) and ATE 8017 (black), 0.90 kg;
- STOP, that is warning: ATE 8014 (yellow) and ATE 8015 (black).
5.56 tiles fit in one square metre. You will find them under 30x60 cm tactile tiles.
Yellow or black
A blind person feels the domes and ribs the same way whatever the colour of the tile. Colour matters for people with low vision: the tile has to stand out from the floor around it. You choose by the floor:
- yellow RAL 1003 on grey paving, asphalt or dark floor tiles;
- black RAL 9017 on white, cream or beige floor tiles, light stone, light marble or light grey floors.
On a pavement with grey paving, a yellow tile can be seen from far away. On the white floor tiles of a hall, the same tile gets lost, and there black gives a strong contrast. Every size and both types come in both colours, so you never have to change size to get the right colour.
How many tiles you need
For a whole area, such as a hall or a platform, work out the surface in square metres, multiply it by the number of tiles per square metre and round up:
- 30 x 30 cm: 11.1 tiles per m², so 12 for 1 m²;
- 40 x 40 cm: 6.25 tiles per m², so 7 for 1 m²;
- 30 x 60 cm: 5.56 tiles per m², so 6 for 1 m².
For a guidance route
Divide the length of the route by the side of the tile that lies in the walking direction and round up. The examples from the product sheets:
- 10 m, 30 cm wide: 34 ATZ 9003 tiles or 17 ATE 8016 tiles;
- 20 m, 30 cm wide, with 30 x 30 cm tiles: 67 tiles;
- 10 m, 40 cm wide: 25 ATZ 9005 tiles; for 15 m, 38 ATZ 9005-BK tiles;
- a 6 m hall with a 30 cm wide route: 20 ATZ 9003-BK tiles;
- an 18 m corridor with a route down the middle: 30 ATE 8017 tiles;
- a 50 m platform with a continuous route: 84 tiles of 30 x 60 cm.
For a pedestrian crossing
In front of the crossing, the warning area covers its full width. Work out how many tiles fit across the width and multiply by the number of rows. For a crossing 3 m wide:
- 30 x 30 cm: two rows, that is 60 cm deep, means 20 ATZ 9004 tiles;
- 40 x 40 cm: a strip 40 cm deep means 8 ATZ 9006 tiles;
- 30 x 60 cm: one row of ATE 8014 tiles, laid with the long side along the crossing, means 5 pieces, and two rows, 10.
For a stair
Before the stair, the warning area covers the full width of the stair, just as at a crossing. The examples from the sheets:
- a 1.2 m stair with 40 x 40 cm tiles: one row 40 cm deep means 3 ATZ 9006-BK tiles, and two rows, that is 80 cm, means 6;
- a 1.5 m stair with 30 x 30 cm tiles: one row means 5 ATZ 9004-BK tiles, and two rows, 10;
- a 1.8 m stair with 30 x 60 cm tiles: one row means 3 ATE 8015 tiles.
The number of rows, one or two, sets the depth of the stopping area. If the building or pavement design asks for a particular depth, work it out from that. Count the guidance tiles and the warning tiles separately: they share the same sizes, but one cannot stand in for the other.
How to fit them
The tiles are glued to the floor with epoxy adhesive, which is not included in the pack and is bought separately. The steps are the same for every size:
- Clean the spot and mark the guidance route and the warning areas on the floor.
- Lay the tiles out without adhesive, to see where the joints fall and where the guidance meets the warning area.
- Check the orientation: on guidance tiles, the ribs in the walking direction; on the 30 x 60 cm size, the 60 cm side in the walking direction.
- Glue the tiles one after another, with the ribs lined up from one tile to the next, so the route stays continuous for anyone following it with a cane.
- Glue the warning area next to the end of the route; with the same 0.8 cm thickness, the two meet at the same level.
How much adhesive you need and how long it takes to set is given on the pack of the epoxy adhesive you use.
Frequently asked questions
What is tactile paving for blind people?
It is a tile with a raised pattern glued onto a pavement, a platform or a floor. A blind person feels the relief with the feet or the white cane: the ribs show the direction, the domes say stop.
What is the difference between a guidance tile and a warning tile?
A guidance tile, such as the ATZ 9005, has parallel ribs that show the walking direction. A warning tile, such as the ATZ 9006, has raised domes set in rows that announce a place where you have to stop.
Which colour should I choose?
The one that contrasts with the floor: yellow on grey paving, asphalt or dark floor tiles, black on white floor tiles, light stone or light marble. The relief feels the same in both colours.
Is the adhesive included?
No. All the tiles are glued with epoxy adhesive, which is bought separately.
How many tiles go in front of a 3 m pedestrian crossing?
It depends on the size and the number of rows: 20 tiles of 30 x 30 cm for two rows, 8 tiles of 40 x 40 cm for a 40 cm strip or 5 ATE 8014 tiles for one row of 30 x 60 cm.
What goes where the route changes direction?
The spot is usually marked with warning tiles, so the person knows to stop and get their bearings, and then the guidance route carries on in the new direction.
Are slatted guidance posts also tactile surfaces?
No. Those are fitted along the edge of the road, for drivers, and are explained in our guide to road beacons.
How we can help
All 12 tiles, guidance and warning, in three sizes and two colours, are under tactile surfaces. If you are not sure how many you need, send us the length of the route, the width of the crossings and stairs and the colour of the floor, and we will put the list together for you, with guidance and warning tiles counted separately. We deliver in 24-48 hours.